Guys, Game of Thrones is back, and I am super pumped about it. It felt as though as I’d been waiting forever. (If you’re not a fan of the show, I would definitely recommend checking out the first season on Netflix… you may find yourself addicted.) It’s one of my favorites… so much that I named my cat Tyrion after one of the main characters.)
But one of my favorite things about the show is the hairstyles! The braids, the twists, the amazing up-dos. So I asked Jay for our second tutorial, if we could try to do something similar to Khaleesi or Cersei’s amazing braided half up/half down styles. Anddd I’m pretty excited by how it turned out. I’ve since managed to recreate it myself; and while I will say that it seems a little bit complicated, it’s not… it’s just really taking that braid and pinning it in different directions. You just need a lot of bobbi pins. PS – if you love this, you can check out our last braid tutorial here!

To start, Jay prepped my hair by shampooing + not conditioning. This seemed odd to me but if you are doing a braid, this is actually a great thing to try as the braid will hold better. From there, he blew my hair out with Oribe’s Apres Beach (an oil based texture spray) to give my hair a next day feel. He then used a 1″ curling iron all over my hair to make some Khaleesi style waves (setting them with Oribe Superfine Hair Spray)

Next, to add extra volume at the crown, he used Kerastase VIP. I hadn’t heard of this product before but it’s pretty cool… it’s like a tease for your hair without the comb (or the tangles.) He pulled the crown of my hair forward and sprayed from the roots to the middle of my hair.

From there, we took the hair and flipped it back. You’ll see there’s lots of volume… 😉

Next, section off the crown.

And from there, section off the bottom pieces that won’t be a part of the braid.

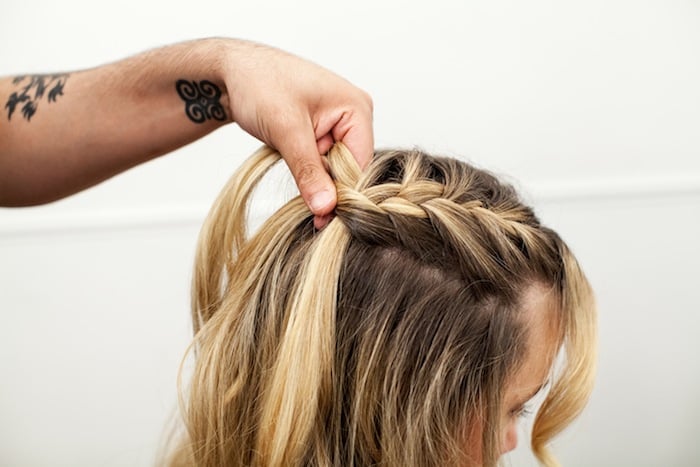
We pulled out a few tendrils to frame my face, and then on the right side, Jay began a french braid… adding hair to every strand as he went (even picking up hair from under the middle section.) For the braid, neatness is not required.. you want it to be a little bit messy.


You could just continue braiding the tail, or get a little bit more creative with the tails. In this case, Jay switched over to a fishtail braid (you do this by just switching up from three strands to two.)
Repeat the braiding process on the second side.


Take the right braid and cross it over the left.

Pin it down and then fold the braid back over to the right side. 
Then, hide the elastic under the braid you started. Pin it under.


Repeat on the opposite side… dragging the braid over to the right, pinning it, folding the braid and bringing it back to the left side.


Secure with bobbi pins, and then touch up your curls with the curling iron.


Voila… all set! (And check out our Crown Braid Tutorial from a few weeks ago!)

Okay, I’m kind of dying over the amount of volume your hair holds! Never mind that gorgeous braid. I love the tip of not conditioning your hair before braiding it – I hate how mine always fall out before the hour is out.
Thanks for sharing such a lovely post!
http://www.lioninthewild.com
Such a beautiful hairdo! Thanks for this tutorial!
http://lartoffashion.com
love this braid!
Your braid game is so strong!
http://www.velvetcrate.com
Gorgeous Grace! If only I were that talented with my own hair haha
xo,
Melissa
MissyOnMadison.com
I need to try that teasing spray–it looks awesome!
http://www.comfortablycasey.com
yes! I’ve never seen anything like it!! I’m ordering my own bottle – it’s crazy what it does in terms of volume, and teasing always makes me nervous as it can’t be good for your hair…
I haven’t tried the Oribe’s Apres Beach yet but I’m wondering if it’s similar to the Bumble and bumble Surf Spray. I’m sure it gives the same next day lived in texture to the hair. Now I just need long hair to achieve this look and it would be perfect!
Hello There, Lady!
Love the hairstyle! I might even attempt to do it for a wedding I’m going to tomorrow. Thanks so much!!✨